2024-09-13
Utiliser des panneaux de bois flexibles et enroulables rainurés (panneau tambour) pour fabriquer une porte tambour
Fiche technique des panneaux de bois flexibles et roulables (panneaux tambour)
Panneau mural cannelé flexible demi-rond en bois massif ou MDF
Types de bois : Chêne Rouge Massif, Panneau MDF
Taille : 4 pieds x 8 pieds (1200 mm x 2400 mm)
Hauteur : 6 mm
Bâton demi-rond : Largeur de 18 mm
Support : Support en tissu non tissé renforcé à la résine ECO
Origine : Fabriqué à Taïwan
Panneau mural avec des lattes de bois flexibles et un dessus en placage de bois
Types de bois : Chêne, Érable, Cerisier et panneau MDF
Taille : 4 pieds x 8 pieds (1200 mm x 2400 mm)
Épaisseur : 3 mm
Lattes plates avec rainure en V : 13 mm, 43 mm, 67 mm et autres largeurs pour commandes spéciales
Structure : Couche supérieure Placage de bois Couche intermédiaire Panneau MDF Couche inférieure Support en tissu non tissé renforcé de résine ECO ou papier kraft
Usages : Habillages de poteaux et revêtements de colonnes intérieurs, panneaux muraux en bois, plafonds, revêtements de surface pour meubles, sols, lambris, portes tambour, panneaux de bois flexibles rainurés en V, panneaux tambour, panneaux MDF, placage bois, panneaux de bois enroulables, panneaux de bois flexibles et enroulables, bricolage (DIY)
Origine : Fabriqué à Taïwan
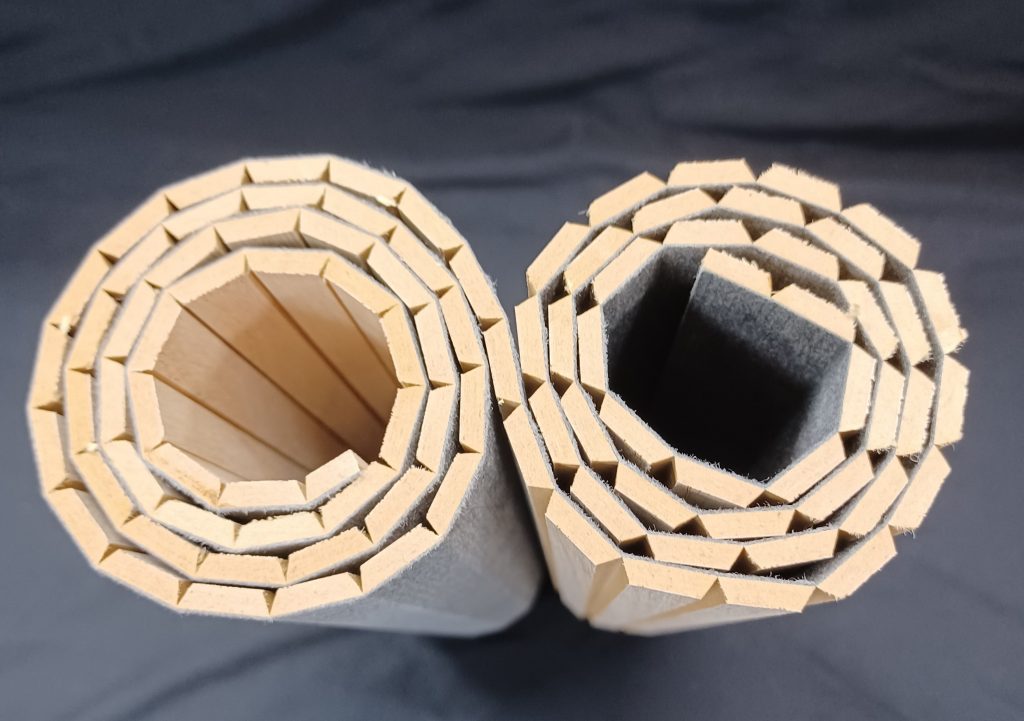
Les meilleurs panneaux tambour : Les meilleurs panneaux tambour et panneaux de bois flexibles rainurés en V se composent de trois couches : une surface en placage de bois sélectionné, un cœur en panneau MDF et un dos avec un support textile. Les deux couches supérieures sont rainurées en V ou cannelées pour assurer flexibilité et enroulabilité, avec un design à lattes de bois qui en fait le choix idéal pour une porte tambour.
Les panneaux de bois flexibles (panneaux Tambour) en trois couches, avec la couche supérieure en placage de bois sélectionné, la couche intermédiaire en panneau de fibres de densité moyenne (MDF) et le dos renforcé avec du textile, sont conçus pour offrir une flexibilité, une capacité d'enroulement et une durabilité accrues, faisant toujours le premier choix pour la fabrication de portes Tambour.
Flexible and rollable wood panel board (Tambour board) making a Tambour door:
Matériaux nécessaires :
- Panneau de bois flexible à rainures en V (panneau Tambour)
- Système de rail de porte Tambour (roulettes et guides)
- Colle à bois ou adhésif
- Scie
- Mètre ruban
- Tournevis
- Papier de verre
- Finition (peinture, teinture ou vernis)
Étapes :
- Mesurer et couper : Mesurez la hauteur et la largeur de l’ouverture où vous souhaitez installer la porte tambour. Utilisez une scie pour découper le panneau de bois flexible rainuré en V (panneau tambour) aux dimensions requises. Assurez-vous que les bords coupés soient bien lisses.
- Préparer le système de rails : Installez le système de rails de la porte tambour en suivant les instructions du fabricant. Cela implique de fixer les roulettes et les guides en haut et en bas de l’ouverture.
- Appliquer de l’adhésif : Appliquez de la colle à bois ou un adhésif au dos du panneau de bois flexible rainuré en V (panneau tambour). Assurez-vous de répartir l’adhésif uniformément.
- Insérer dans le rail : Insérez délicatement une extrémité dans le rail
- Insérer dans le rail : Insérez délicatement le panneau de bois flexible rainuré en V (panneau tambour) dans le système de rails situé en bas de l’ouverture. Pliez légèrement le panneau de bois flexible rainuré en V (panneau tambour) et guidez-le dans le rail supérieur. Faites-le glisser lentement dans le rail, en vous assurant qu’il se déplace en douceur.
- Test and Adjust: Roll the Tambour door up and down a few times to test its movement. Make any necessary adjustments to ensure that the door operates smoothly within the track.
- Ajuster si nécessaire : Si le panneau de bois flexible rainuré en V (panneau tambour) est légèrement plus large que l’ouverture, il peut être nécessaire de découper les côtés avec une scie pour assurer un ajustement parfait.
- Finition : Poncez les bords et les surfaces de la porte tambour pour obtenir une finition lisse. Appliquez la finition de votre choix, comme de la peinture, une teinture ou du vernis, en suivant les instructions du fabricant. Laissez sécher complètement avant de poursuivre.
- Installation finale : Une fois la finition sèche, faites glisser délicatement la porte tambour dans le système de rails. Assurez-vous qu’elle se déplace librement et sans accroc.
- Installation du matériel : En fonction du design, vous devrez peut-être fixer des poignées ou des boutons à la porte tambour pour en faciliter l’utilisation.
- Tester et ajuster à nouveau : Faites rouler la porte tambour plusieurs fois vers le haut et vers le bas pour vérifier qu'elle fonctionne correctement. Effectuez les derniers ajustements si nécessaire.
Félicitations ! Vous avez créé avec succès une porte tambour en utilisant le panneau de bois flexible et rollable rainuré en V (panneau tambour).
Mots clés Porte tambour Panneau de bois flexible rainuré en V, panneau tambour, panneau MDF, placage de bois, panneau de bois rollable, panneau de bois flexible et rollable, DIY