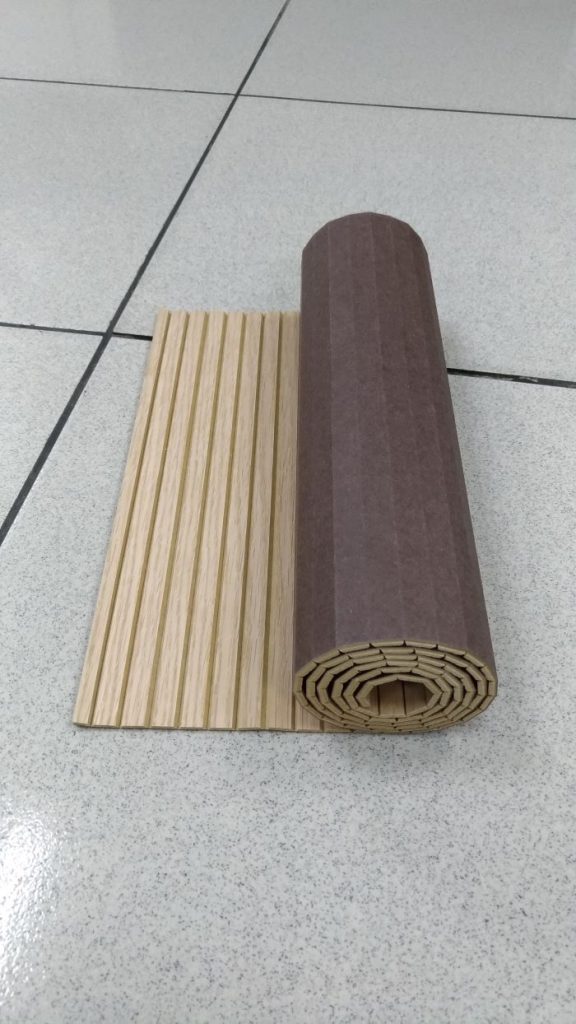
Grooved flexible wood panel board very suitable for wrapping the pole, column and round objects
Specification sheet of flexible wood panel boards
Flexible fluted Half-Round Solid wood or MDF Wood sticks wall Panel Board
Wood kinds: Solid Red Oak, MDF board
Size: 4 feet X 8 feet (1200 mm x 2400 mm)
Height: 6 mm
Half round stick: 18 mm width
Backing: ECO resin reinforced non-woven fabric backing
Origin: Made in Taiwan
Wood Veneer top flexible grooved wood slats wall panel board
Wood kinds: Oak, Maple, Cherry, and MDF board
Size: 4 feet X 8 feet (1200 mm x 2400 mm)
Thickness: 3 mm
Flat slat by V-grooved: 13 mm, 43 mm, 67 mm and other widths for special orders
Structure: Top Layer Wood veneer Middle Layer MDF board Bottom Layer ECO resin reinforced non-woven fabric backing or kraft paper
Usages: Interior pole wraps and column covering, wood wall paneling, ceiling, furniture surface covers, flooring, wainscoting, flexible wood board, wrapping the pole and column, V-grooved flexible wood board, curved wall cover, art wall, round or curved objects cover, pole wrap panel, pole wrap, pole wrap wood board, pole wrap wood panel.
Origin: Made in Taiwan
Flexible wood panel board very suitable for wrapping the pole, column and round objects
One of designer offer the Installing Pole/Column wrap process as under mentioned.
You will need: • Caulking gun with tube of construction adhesive • Fine-tooth saw • Utility knife & No. 2 pencil • Straightedge • Tape measure • Masking tape (painter’s blue masking tape) • Brown and wax paper (Brown paper to be placed on top of carpet and around pole, and wax paper for up against the soffit/header. After you apply the finish to pole wrap panel, pull the paper out and use a nail to pull the carpet fibers up between the bevels of the slats.)
Note: If you have a Jack post see the separate instructions for preparation.
IMPORTANT: In winter or in high-moisture seasons, pole wrap needs to be acclimated. This means that you need to allow the product to adjust to its new environment before installation. The best way to begin this process is to take the pole wrap panel out of the tube and (with the finish side up) lay it flat on top of sleepers (2x material) to keep it off the ground—and especially off the basement floor. This will allow air to freely circulate around it. Do not cut pole wrap flexible boards until it has been acclimated. Depending on the environment, allow it to acclimate for at least 2 days and up to a week. This will keep the joint stable and help eliminate shrinkage at the seam.
Step One: Measure the exact height of the pole to be covered. Spread pole wrap wood panel on a flat surface and, using your pencil and straightedge, mark a horizontal line across the outside at the appropriate height measured. Next, cross-cut pole wrap panel using a pull-saw. You may find cutting with an electric miter saw yields a better cut providing you use a carbide-tipped 96-tooth blade. Cut with the wood rolled to the inside—backing facing out.
Step Two: Measure the circumference of the pole. Using a utility knife, cut one slat larger than the circumference of the pole leaving approximately 1/8 to 1/2 inch of extra width/overlap. The amount of adhesive to be applied later will take up the slack so the pole wrap panel ends will meet.
Step Three: Use your hands to flex (break down) each slat, so that each slat moves freely and will adhere evenly to the pole surface .
Step Four: Using your straight edge and pencil, mark a vertical line on the pole where you want your seam. Using a caulking gun, apply full 1/4 inch beads of adhesive directly onto the pole 1/4 inch away from the line on both sides. Then apply adhesive horizontally around the pole about every 6 inches—starting 1 inch down from the top and 1 inch up from the bottom.
Step Five: After the adhesive is applied, promptly position pole wrap panel around the pole. Begin by affixing the inside middle and then wrap to the outside edges. Use masking tape to secure pole wrap panel in position for drying. Wrap tape about every 2 feet, making sure pole wrap panel ends meet evenly.
Step Six: After the adhesive has dried, remove tape and trim away any excess adhesive with a utility knife. The surface can then be painted or stained as you would any other wood surface.
