2024-09-6
Easy installation V-grooved flexible wood panel boards for furniture/upholstery by DIY with normal glue, saws or scissors, staples without power tools for furniture/upholstery by DIY
Specification sheet of flexible wood panel boards
Flexible fluted Half-Round Solid wood or MDF Wood sticks wall Panel Board
Wood kinds: Solid Red Oak, MDF board
Size: 4 feet X 8 feet (1200 mm x 2400 mm)
Height: 6 mm
Half round stick: 18 mm width
Backing: ECO resin reinforced non-woven fabric backing
Origin: Made in Taiwan
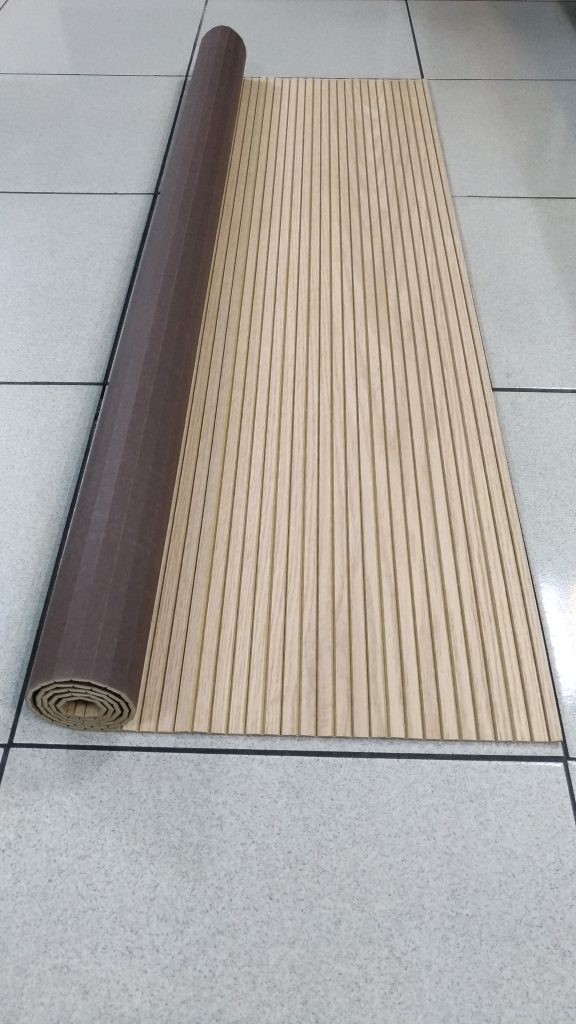
Wood Veneer top flexible grooved wood slats wall panel board
Wood kinds: Oak, Maple, Cherry, and MDF board
Size: 4 feet X 8 feet (1200 mm x 2400 mm)
Thickness: 3 mm
Flat slat by V-grooved: 13 mm, 43 mm, 67 mm and other widths for special orders
Structure: Top Layer Wood veneer Middle Layer MDF board Bottom Layer ECO resin reinforced non-woven fabric backing or kraft paper
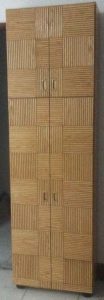
Usages: Interior pole wraps and column covering, wood wall paneling, wood ceiling paneling, furniture surface covers, flooring, wainscoting, upholstery surface cover, wood wall paneling, Wall Panels,
Origin: Made in Taiwan
Easy installation, flexible wood panel boards for furniture/upholstery
- Prepare the surface: Ensure that the surface you’re applying the furniture/ upholstery to is clean and free of dust or debris. If necessary, sand the surface lightly to create a better bonding surface.
- Gather your materials: You will need the V-grooved flexible wood panel, saws or scissors, staples, and a suitable adhesive. Choose an adhesive that is suitable for the materials you’re working with, such as wood/fabric glue or a multipurpose adhesive.
- Cut the V-grooved flexible wood panel: Measure and cut the V-grooved flexible wood panel, according to the dimensions of the surface you’re covering. Leave some excess board around the edges to allow for adjustments during installation.
- Apply the adhesive: Apply a thin layer of adhesive to the surface, spreading it evenly using a brush or a small roller. Follow the instructions provided by the adhesive manufacturer regarding drying time and application techniques.
- Position the V-grooved board: Carefully place the V-grooved board onto the adhesive-covered surface, starting from one edge and working your way across. Smooth out any wrinkles or bubbles as you go along to ensure a neat and even appearance.
- Secure the edges: Use a staple gun to secure the edges of the V-grooved board to the underside of the surface. Start from one side and work your way around, pulling the board taut and placing staples at regular intervals. Trim any excess board if necessary.
- Finishing touches: Once the V-grooved board is securely fastened, ensure that it is smooth and free of wrinkles. Make any necessary adjustments by loosening or re-stapling the V-grooved board. Trim off any excess board to create a clean finish.
- Allow for drying: Give the adhesive ample time to dry according to the manufacturer’s instructions. Avoid putting any strain on the board during this time to ensure a strong bond.
Remember, different furniture/ upholstery projects may have specific requirements and techniques. It’s always a good idea to consult additional resources, such as online tutorials or instructional videos, that are specific to your particular project.
Key words: wood wall paneling, Wall Panels, flexible wood panel, furniture, upholstery surface cover, furniture surface covers, DIY, wood wall paneling, wood ceiling paneling